Kokeshi Doll Clothespin
Click here to download project sheet.
MATERIALS
SUPPLIES:
- 1 qty. 12 in. Wooden Clothespin • 30081487
- 1 qty. 4-1/2 in. x 5 in. Flesh Foamie • 77613463
- 2 qty. 5-1/2 in. x 5-1/2 in. Black Foamie • 77613620
- 2 qty. 12 mm. Moving Eyes • 30055158
- 2 qty. 2-1/2 in. x 8-1/2 in. Washi Paper, Printed paper or fabric for Kimono
- 2 qty. 3 in. x 12 in. Washi Paper, Printed paper for fabric for Kimono Sleeves
- 2 qty. 3 in. x 11 in. Cardstock for Kimono Sleeves
- 2 qty. Chenille Stem for sleeves
- 2 qty. 1/2 in. x 3 in. Cardstock for "V" neck
- 1 qty. 36 in. of Ribbon for obi, approx. 1-1/2 in. wide
- 1 qty. 4 in. x 8 in. Cardstock for fan
- 1 qty. 18 in. of 1/8 in. ribbon
- Cherry Blossom type flowers spray
- Lisa Pink Acrylic Paint • 77626507
- 7/16 in. Double Stick Tape • 30013285
TOOLS:
- Pen/Pencil
- Fine Tip Paintbrush
- Floral Wire Cutter • 77819151
- Scissors
- Low Temp Glue Gun • 77536417
- Glue Sticks • 77533638
DIRECTIONS
NOTE: Please refer to PDF for patterns.
Work with the clip side of the clothespin facing up.
Place double stick tape to the backside of the 2-1/2 in. x 8-1/2 in. pieces of printed paper of fabric. Adhere to the front and back of the clothespin, aligning with the bottom edges of the clip. This is the kimono body.
Place the two 1/2 in. x 3 in. cardstock strips at an angle onto the top edge on one side, forming the "V" neck as pictured in the sample. Trim edges to align with kimono front edges. Adhere. For the obi, take the wide ribbon and find the center point. Place horizontally in front just where the "V" meets. Take one end of the ribbon and slip it through the spring closure coming out on the other side. Do the same for the other end of the ribbon. Take both ends and continue wrapping around to the other side of the clothespin. Tie into a box for the obi.
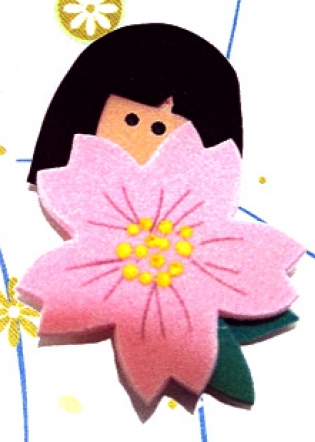
Trace and cut out the pieces from foamie according to the patterns. For the head, place the Hair Front (piece with the cut-out) onto the face piece. Glue in place. Place the two 12 mm. moving eyes in the center of the face and glue in place. Use the fine tip paintbrush to paint two small circles of pink acrylic paint for the cheeks. Let dry. Place a few flowers at the top right corner of the hair and glue in place. Place the head on the front of the clothespin at the top. Make sure the head slightly overlaps the top of the kimono. Glue in place. On the back side of the clip, take the Hair Back and carefully match it up with the front head piece. Glue to the back to the clip.
Fold one of the 3 in. x 11 in. cardstocks in half so that it is only 5-1/2 in. long. Unfold the piece and place double stick tape around the edges. Fold one of the 3 in. x 12 in. printed papers in half and unfold. Carefully match the fold lines and adhere the printed paper to the cardstock piece. Smooth and fold the piece in half. Fold under the two 1/2 in. edges of printed paper and adhere to these two edges together. Take a chenille stem and fold it in half. Glue the chenille stem inside of the sleeve at the fold, with half of it sticking out. Repeat with other cardstock and printed paper. These are the kimono sleeves.
Attach the sleeves to either side of the body by gluing the protruding chenille stems to the clothespin. Glue the sleeves right where the head and body meets. The chenille stem will allow you to bend the sleeve a little to position in front of the body.
Finishing: Take the card piece and accordion fold to form the fan. Glue together one edge and fan out other. Tie the 1/8 in. around the glued end to form the fan handle. Add flowers on top of the fan if desired. Glue fan to the end of one sleeve in front of the body.
SHARE: